Last Christmas, a friend gave me a whole ham, and I didn’t know where to start when I looked at it! Excited yet confused — I believe many newcomers to Spain have felt the same. As a whole Spanish ham recommendation experienced person, after some research and practice, I’m here to share my beginner’s slicing insights, hoping to help those who, like me, feel overwhelmed facing a big ham leg.
Step 1: Preparation – A Good Tool is Essential
To slice ham elegantly, a professional set of tools is indispensable—you can’t skip this investment. At minimum, you need:
- Ham Stand: Used to secure the ham. This is the most crucial tool to ensure safety and slicing quality.
- Ham Knife: A very long, narrow, and flexible knife specifically for slicing thin pieces.
- Boning Knife/Short Knife: Used to cut and clean the outer hard skin and fat layers.
- Sharpening Rod: To keep your ham knife sharp before each slicing.
Safety first! Always focus intensely when slicing. The hand not holding the knife must always stay behind the path of the blade’s movement.
Step 2: Securing and Cleaning
Firmly fix the ham onto the ham stand. You will notice there are two sides to the ham: one with more meat and fat called “Maza”; the other leaner side called “Contramaza”. For which side to start with, refer to the table below:
| Part | Characteristics | Recommended Eating Order |
|---|
| Maza | More meat, oilier, better texture | If planning to finish soon, start slicing here at whole Spanish 5J ham |
| Contramaza | Leaner meat, drier and tougher | If planning to consume over a longer period, start here |
After deciding, use the short knife to remove the hard outer skin and the yellow fat layer only from the area you plan to slice that day. Note: Leave the remaining fat to protect the meat inside from drying out.
Step 3: The Art of Slicing
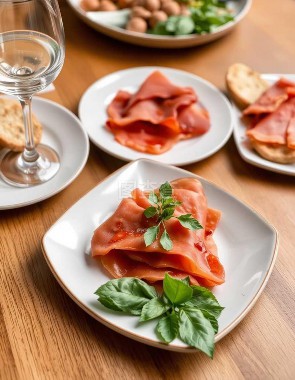
Now the exciting slicing step! Use the long ham knife, holding it horizontally, and slice gently back and forth using the full length of the blade. The motion should be like playing a violin, not chopping down forcefully. Our goal is to cut semi-transparent thin slices with white fat marbling. Ideal slices melt instantly in your mouth! As the cutting surface grows larger, keep the slice surface flat at all times.
After slicing, cover the cut surface with the large white fat pieces you just cut off, then wrap it with cling film or a clean cloth and store it in a cool, ventilated place. Absolutely do not refrigerate, as low temperatures damage the ham’s flavor and fat structure. That’s my initial sharing; does anyone have secret tips? Feel free to share below! Enjoy your ham slicing!