After staying in Spain for a while, I’ve often drooled looking at the long hams hanging in the stores. Recently, I got inspired to research how to make Spanish ham at home. Although it takes time, the principle isn’t complicated. Today, I’m sharing my “study notes” with you, and I welcome experts to offer suggestions!
Step 1: Selecting and Preparing the Meat
The hardest part is always the start: choosing the right pig leg is half the success. Usually, we select the hind leg because it has thicker meat. The front leg is also possible but smaller. The fresh pork leg you buy should be trimmed first, removing excess fat and debris, then make a V-shaped incision near the root to help salt penetrate later. Remember, the entire process must be absolutely clean to avoid bacterial contamination.
Step 2: Salting and Washing
This is the Spanish ham production process that determines the ham’s flavor and preservation success, the key step of the Spanish ham making method. Completely bury the pork leg in coarse sea salt, ensuring no dead angles. The curing time depends on the leg’s weight; the general rule is one day per kilogram.
| Weight of Pork Leg | Suggested Curing Days |
|---|
| 10 kg | 10 days |
| 12 kg | 12 days |
| 14 kg | 14 days |
After curing, wash off all surface salt granules thoroughly with warm water, then dry with a clean cloth. This process, called “salt washing,” is crucial; otherwise, the ham will be overly salty.
Step 3: Drying and Maturation
Now comes the long wait, involving two stages:
- Drying Period: About 3–6 months. Hang the ham in a cool, ventilated, and low-humidity place. During this phase, the ham rapidly loses water and the surface hardens.
- Aging Period: At least 6 months, with premium Iberian hams needing 2 to 3 years. Move the ham to a cellar or specialized aging room with stable temperature and humidity. Inside, proteins and fats undergo fascinating chemical reactions, turning what might seem like
“dark cuisine” into top-tier delicacy.
Tips for Homemade Production
At home, controlling temperature and humidity is the biggest challenge. A north-facing balcony or basement is ideal, and winter is the best time to start. Regularly check the ham’s surface: small harmless blue mold spots are normal and can be brushed off. But if the Spanish ham making develops black mold or green fuzz, it may signify failure.
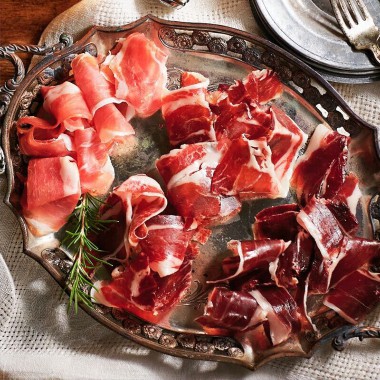
Finally, enjoy the pride of slicing the first piece of your own ham! Although the entire process is lengthy, tasting your unique homemade “Jamón” is absolutely worth it! Have any friends tried this? Let’s share experiences together!