Having been in Spain for quite a while, it’s hard to find anyone who doesn’t love ham here. Every time I go to the supermarket and see rows of Jamón, I start drooling. One day, I suddenly wondered, can I make a whole ham at home by myself? After researching extensively and practicing, today I’m sharing the entire homemade Spanish ham process. It’s a long journey, but the sense of accomplishment when slicing the first piece of ham you made is overwhelming!
Step 1: Preparation
Selecting the Pig Leg and Materials
First, you need a fresh raw pig hind leg, preferably with skin and trotter attached. Just ask your butcher directly for a pig hind leg meant for curing. Beginners are recommended to start with a 10-15 kg Serrano white pig leg. Besides the leg, the most important ingredient is a large amount of coarse sea salt—note, not the fine salt used for daily cooking. Also prepare a large plastic or wooden box big enough to hold the entire leg, along with hooks and strings for hanging after the Spanish ham making process.
Step 2: Core Steps – Curing and Shaping
This is the most critical step in determining the flavor and success of your ham, as explained in the Spanish ham making method. First, massage the leg by hand, squeezing the remaining blood out of the veins from the trotter upwards. Then, lay a thick layer of sea salt at the bottom of the box, place the leg inside, and completely cover it with salt so no meat is exposed. The curing time is generally calculated by weight, about one day per kilogram. For example, a 12 kg leg gets cured for 12 days. After curing, take out the leg and rinse off all surface salt crystals thoroughly with running cold water. After washing, hang it in a cool place to dry the surface moisture.
Step 3: The Long Wait – Drying and Aging
After washing and drying, the long waiting period begins. This process comprises several stages requiring different temperature and humidity levels, which are the hardest to control at home. A cool, ventilated, and dark basement or garage is ideal. Here is a rough reference for time and environmental conditions:
| Stage | Temperature | Humidity | Approximate Duration |
|---|
| Curing | 2-5°C | 80-90% | 1 day/kg |
| Shaping | 3-6°C | 80-90% | 40-60 days |
| Drying | 15-30°C | 60-80% | 6-9 months |
| Aging | 10-20°C | 60-80% | 6-12+ months |
During drying and aging, the ham slowly dehydrates, losing about 30%-40% of its weight. Its surface will develop a harmless mold layer, which is normal and helps form unique flavors—don’t worry about it. You can gently press it every few months to feel how the hardness changes.
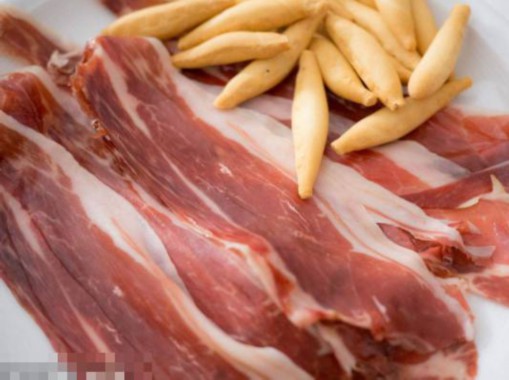
Step 4: Unwrap and Taste!
This whole process takes at least a year and a half, truly a test of patience. When the ham hardens, and using a special bone needle to pierce different parts reveals a rich meaty aroma, it means the ham has matured perfectly, as shown in the Spanish ham making process. Remove the mold and hardened fat layer from the surface, and slice the first wafer-thin, glossy slice with a ham knife—all the waiting will be worth it! Beginners are advised to start with lighter Serrano white pig legs rather than expensive Iberian black pig legs to avoid too much heartbreak if it fails. Feel free to share your experiences or questions below for discussion!